Introduction
Yoga at home offers an accessible path to improved flexibility, strength, and mental calm without gym memberships, expensive classes, or intimidating studio environments.
Perhaps you’ve watched yogis twist into pretzel shapes and thought. But here’s the truth: yoga meets you exactly where you are. Every expert once started as a complete beginner.
This guide presents five foundational yoga poses perfect for beginners practicing at home. These essential postures build strength, increase flexibility, and establish proper alignment that protects you as your practice deepens.
You’ll learn exactly how to perform each pose safely, understand the benefits each provides, and discover modifications that accommodate your current fitness level. No expensive equipment or previous experience required just you, comfortable clothing, and a small floor space.
Whether you’re seeking stress relief, gentle exercise, or the beginning of a lifelong practice, these five poses create the perfect foundation for your home yoga journey.
Why Practice Yoga at Home?
Home yoga practice offers unique advantages that studio classes cannot match. Understanding these benefits motivates consistent practice and helps you maximize your wellness investment.
Convenience and Accessibility
No commute, no scheduling conflicts, no weather excuses. Your living room, bedroom, or even backyard becomes your personal studio available 24/7. This accessibility removes barriers that often derail good intentions.
Early risers can practice at dawn; night owls can flow at midnight. Parents can squeeze in sessions during nap times. The flexibility of home practice fits yoga into your life rather than forcing your life around class schedules.
Privacy and Comfort

Beginners often feel self-conscious in public classes, comparing themselves to experienced practitioners. Home practice eliminates this pressure entirely.
You can pause, restart, fall out of poses, and laugh at yourself without witnesses. This psychological safety encourages experimentation and genuine exploration of your body’s capabilities without judgment.
Cost Effectiveness
Quality yoga instruction typically costs $15-25 per class. Home practice requires only a mat (optional for carpeted floors) and perhaps a few online resources. Many excellent beginner programs are completely free on YouTube.
The financial savings compound significantly over time, making yoga accessible regardless of economic circumstances.
Personalized Pace
Studios move at predetermined speeds that may not match your needs. At home, you hold poses as long as beneficial, skip what doesn’t serve you, and focus extra time on challenging areas.
This customization accelerates progress and prevents frustration common when beginners try to match experienced practitioners.
Essential Equipment for Home Yoga
Starting yoga at home requires minimal investment. Here’s what helps and what’s truly necessary.
The Yoga Mat
A mat provides cushioning for knees and stability for standing poses. For beginners, any exercise mat works even a thick towel on carpet suffices initially.
When purchasing a dedicated yoga mat, prioritize grip (prevents slipping) over thickness. A 4-6mm mat balances cushioning with stability.
Optional Props
Blocks provide height when flexibility limits reaching the floor. Books or firm pillows substitute adequately for beginners.
Straps extend reach for stretches. A bathrobe belt or regular towel works identically.
These props aren’t luxuries for inflexible people they’re tools that help everyone access poses more effectively.
What You Don’t Need
Expensive clothing, fancy studios, perfect bodies, or natural flexibility. Yoga adapts to you, not the reverse. Comfortable clothes that allow movement are the only requirement.
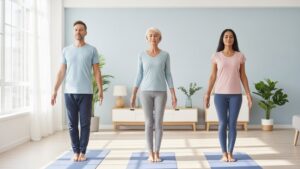
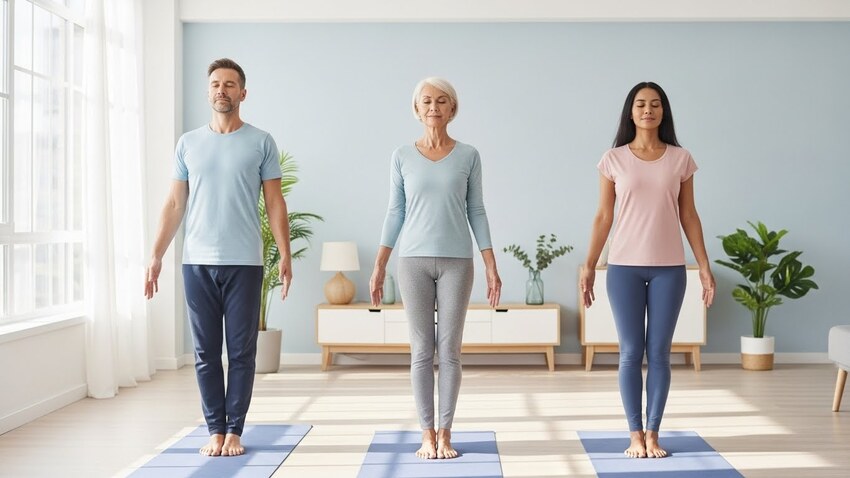
Pose 1: Mountain Pose (Tadasana)
Mountain Pose appears deceptively simple but forms the foundation for all standing poses. It teaches proper alignment, body awareness, and centered presence.
How to Practice Mountain Pose
Stand with feet hip-width apart (or together for challenge). Distribute weight evenly across both feet feel all four corners of each foot grounding down.
Engage thigh muscles slightly without locking knees. Lengthen your tailbone toward the floor while gently drawing your belly in. Roll shoulders back and down, arms resting at sides with palms facing forward.
Lift through the crown of your head as if a string pulls you skyward. Relax your face, jaw, and neck while maintaining this tall, dignified posture.
Benefits of Mountain Pose
This foundational posture improves posture awareness, strengthens thighs and ankles, and creates a baseline for recognizing proper alignment. Regular practice corrects the slouching habits of modern desk life.
Common Mistakes to Avoid
Avoid locking knees (keep micro-bend), overarching lower back, or tensing shoulders up toward ears. Mountain pose should feel effortless yet alert stable like a mountain yet alive with subtle energy.
Pose 2: Downward-Facing Dog (Adho Mukha Svanasana)
Perhaps yoga’s most recognizable pose, Downward Dog stretches and strengthens simultaneously. It becomes a resting position as your practice develops.
How to Practice Downward Dog
Begin on hands and knees with wrists under shoulders and knees under hips. Spread fingers wide, pressing firmly through entire palms.
Tuck toes and lift hips toward the ceiling, straightening legs as much as comfortable. Your body forms an inverted V-shape. Push the floor away to lengthen your spine.
Let your head hang naturally between upper arms. Pedal your feet gently, alternating bent knees, to stretch calves and hamstrings.
Modifications for Beginners
Keep knees generously bent straight legs aren’t required and forcing them strains hamstrings. Place hands on blocks or a raised surface if wrists or shoulders feel stressed.
Walk hands slightly forward of the traditional position if shoulder tightness limits the pose. Prioritize length in your spine over straight legs every time.
Benefits of Downward Dog
This pose stretches hamstrings, calves, shoulders, and back while strengthening arms and legs. It calms the nervous system (mild inversion), relieves headaches, and builds upper body strength progressively.
Pose 3: Warrior I (Virabhadrasana I)
Warrior I builds lower body strength, opens the chest, and cultivates the focused warrior spirit its name suggests. It’s empowering and accessible for most beginners.
How to Practice Warrior I
From Mountain Pose, step one foot back approximately 3-4 feet. Angle the back foot out about 45 degrees. Bend your front knee until thigh approaches parallel to the floor (or less deeply for beginners).
Keep your front knee aligned directly over the ankle never extending past toes. Square your hips toward the front of your mat as much as possible.
Raise both arms overhead, palms facing each other. Lift your chest and gaze forward or slightly upward.
Alignment Cues
Imagine your hips as headlights both should point straight ahead. The back heel may lift slightly if hip flexibility limits this squaring; over time, work toward grounding it.
Keep the front knee tracking directly over the second toe, not collapsing inward. Engage your core to protect the lower back as arms extend overhead.
Benefits of Warrior I
Warrior I strengthens thighs, glutes, and ankles while stretching hip flexors and shoulders. It builds heat and stamina, improves balance, and develops mental focus and determination.
Pose 4: Cat-Cow Stretch (Marjaryasana-Bitilasana)
This gentle flowing sequence warms the spine, releases tension, and connects breath with movement a cornerstone of yoga practice.
How to Practice Cat-Cow
Start on hands and knees in tabletop position. Align wrists under shoulders and knees under hips. Maintain a neutral spine initially.
For Cow Pose: Inhale, dropping your belly toward the floor. Lift your chest and gaze forward. Your back curves into a gentle U-shape.
For Cat Pose: Exhale, rounding your spine toward the ceiling. Tuck your chin toward chest and tailbone under. Your back domes like an angry cat.
Flow smoothly between these positions, moving with your breath. Continue for 5-10 breath cycles or longer.
Synchronizing Breath and Movement
The inhale naturally accompanies the opening, heart-lifting Cow position. The exhale accompanies the contracting, protecting Cat position. This breath-movement coordination introduces the fundamental yoga principle of pranayama (breath work).
Benefits of Cat-Cow
This sequence gently massages the spine, increasing flexibility and relieving tension accumulated from sitting. It stretches the torso, shoulders, and neck while calming the mind through rhythmic breathing.
Cat-Cow serves as excellent warm-up for any yoga practice and provides therapeutic relief for back discomfort.
Pose 5: Child’s Pose (Balasana)
Child’s Pose offers rest, restoration, and gentle stretching. It’s yoga’s universal “pause button” always available when you need to rest during practice.
How to Practice Child’s Pose
Kneel on the floor with big toes touching and knees spread apart (width comfortable for you wider provides different stretches than closer).
Fold forward, lowering your chest toward thighs and forehead toward the floor. Extend arms forward with palms down, or rest them alongside your body with palms up.
Allow your entire body to relax into the pose. Breathe deeply into your lower back, feeling the gentle expansion with each inhale.
Variations for Different Bodies
If forehead doesn’t reach the floor comfortably, rest it on stacked fists or a pillow. If hips don’t reach heels, place a folded blanket between them.
For shoulder tightness, keep arms alongside the body rather than extended. Every adaptation is valid the goal is comfortable, sustainable rest.
Benefits of Child’s Pose
Child’s Pose gently stretches hips, thighs, and ankles while releasing back and shoulder tension. It calms the nervous system, relieves stress and fatigue, and provides mental rest during challenging practices.
This pose teaches an essential yoga lesson: rest is productive, not weakness.
Building Your Home Yoga Routine
These five poses create a complete beginner sequence when practiced together. Here’s how to structure your home practice.
Sample 15-Minute Beginner Flow
Mountain Pose (1 minute) – Center yourself
Cat-Cow (2 minutes) – Warm the spine
Downward Dog (1-2 minutes) – Stretch and strengthen
Warrior I (1 minute each side) – Build heat
Downward Dog (1 minute) – Transition
Cat-Cow (1 minute) – Cool down
Child’s Pose (2-3 minutes) – Rest and integrate
Repeat this sequence 2-3 times as fitness improves, holding poses longer and flowing more smoothly between them.
Practice Frequency
Aim for 3-4 practice sessions weekly initially. Short daily practice benefits flexibility and habit formation more than occasional longer sessions. Even 10 minutes counts consistency trumps intensity for beginners.
Conclusion
Starting yoga at home requires no special abilities, perfect flexibility, or expensive equipment. These five foundational poses Mountain, Downward Dog, Warrior I, Cat-Cow, and Child’s Pose provide everything needed to begin a transformative practice.
You’ve learned proper alignment, helpful modifications, and the unique benefits each pose offers. You understand how to structure a simple routine and why home practice offers distinct advantages for beginners.
The physical benefits increased flexibility, improved strength, better posture will emerge gradually with consistent practice. The mental benefits reduced stress, greater calm, improved body awareness often appear even sooner.
Your next step? Unroll a mat (or towel), take a deep breath, and move through these poses just once. That single practice begins your yoga journey. Every experienced yogi started exactly where you are now.
Enjoyed this guide? Explore our meditation for beginners article to complement your yoga practice with mindfulness training.
Health Disclaimer: This content is for informational purposes only and is not a substitute for medical advice or professional healthcare guidance. If you experience pain during any pose, stop immediately and consult a qualified instructor or healthcare provider.


 25")